Wednesday, January 29, 2014

A Little Thank You Card


Hi Blog Friends,

Here's a card I made with different widths of card stock strips.  I'm such a paper hoarder, and especially keep papers that I can't find anymore.  I especially like the metallic moire card stock.  Used to be able to buy it at the former Xpedx in Albuquerque, but then they stopped carrying the really nice card stock.  Now it's a different store (still a paper supply store tho), but even less selections of card making card stock.  Anyway, one day I put some colors together and made a few cards.  Really fun to make and you get to use those precious metallic strips! You can see the gold moire strip upper left hand corner.  One of my faves!  Add your sentiment, a little bling, and you're all done.  Now you know what to do with those little strips of card stock you've been hoarding!  Lol


Thanks for stopping in today.  Until next time...

Saturday, January 25, 2014

Do you remember PSX stamps?

Hi Blog Friends,

Here's an Asian image by the former PSX stamp company.  I'm pretty sure that Inkadinkado bought PSX, or at least bought some of their images.  PSX made some great images for sure.  Thinking back, I'm sure it was PSX I found at a tiny craft show in Albuquerque, one weekend, and when I discovered the world of "embossing" (the girl who was selling PSX stamps was demonstrating embossing powders).....well, I was hooked.  I thought the beautiful gold and silver embossing powders were magic!   :o)   After buying a couple of stamps, embossing powders and a heat tool, I was on my way!  Anyway, here's the Asian image done in pinks, orange and a touch of yellow.  I think the "thank you" stamp might be from Stampendous.  Although you can't see it in photo, the piece with the stamped images is embossed with clear embossing powder (the whole sheet).  


Here's a closeup of the cherry blossoms embossing folder by Cuttlebug used on the background.  Holey moley, this picture of the pink background almost looks fluorescent, but the actual color is like the top picture.  


Thanks for stopping by today!  I hope you're having a great weekend.  I'll be back later.  Until next time...

Thursday, January 23, 2014

Shattered Glass Technique


Hi Blog Friends,

Here's an oldie but goodie technique called Shattered Glass.  Really easy to do, by just taping down paper, or removable tape in a random fashion, inking up the areas, then stamping your images into the sections.  The main image, the beautiful Asian woman is by Stampington.  She's one of my favorite Asian stamps.  A little bit of red bling on the left side, backing with different card stocks, and all done.


Here's a closeup of her beautiful face with butterfly wings.  Love it.

Thanks for stopping by today.  I'll be back later.  Until next time...


Sunday, January 19, 2014

A Stamp in the Hand Pomegranates

Hello Bloggers!

A short post today.  This pomegranate image is by A Stamp in the Hand.  And oldie but goodie.  I used Kaliedacolor ink pad for the orange hues, and a Brilliance ink pad for the shimmery background design.  Martha Stewart punch for the bottom of the card, and finished it off with a few flowers and rhinestones.  The Brilliance background was stamped with a Magenta stamp.


Thanks for stopping by today.  Until next time....

Friday, January 10, 2014

Dorothy & Toto are back

Happy Weekend Blog Friends!

As promised, here's the second Dorothy and Toto in purple, lilacs and greens.  I used the same design on both cards since I was making two in a row.  This one went to my dear friend Liane, for her birthday.  Happy Birthday, Liane!

Copics were used to color the image.  The leaf sprig is a Spellbinders die, and I added three tiny rhinestones for some bling.  Stickles glitter glue was added to the lacey top of her dress and to her hair ribbons.  You can just barely see the tiny hot air balloons I stamped on the card stock right behind Dorothy.


Gotta love Toto's little goggles!


Wishing you all a restful weekend!  Thanks for dropping by today.  I'll be back next week with something new.  Until next time...


Tuesday, January 7, 2014

Up Up and Away.....with Dorothy & Toto

Hello Blog Friends!

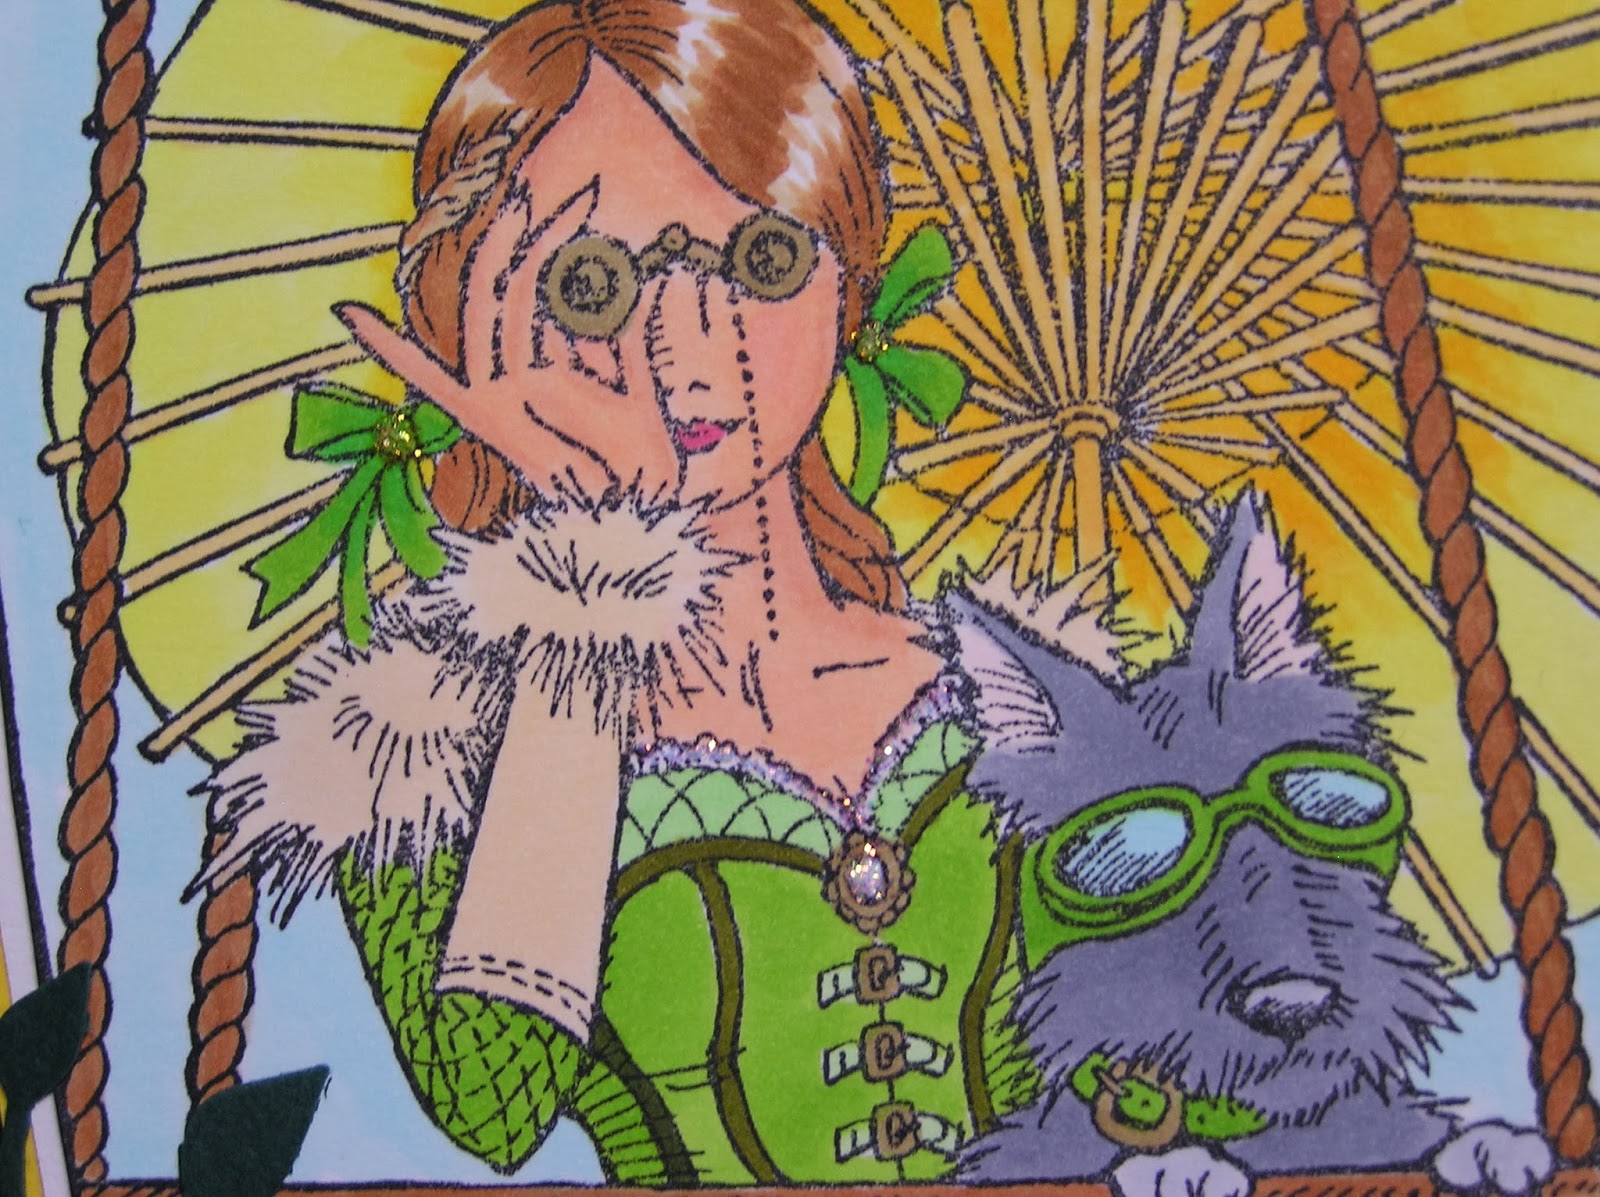
Today's post is a card I made with a Stampendous stamp.  It's Dorothy from the Wizard of Oz with her little buddy, Toto flying in a hot air ballon.  My daughter-in-law suggested the "yellow umbrella and green dress."  It sounded like a pretty combination, so here it is.  I fell in love with this image the moment I spotted it. Don't you just love Toto's goggles?  I do!  So much fun to color too.  Scrapbook paper was used on the background, and I die cut the leaves from a Spellbinder die.  I added three tiny rhinestones on the leaves for a touch of bling.  Also, a touch of Stickles glitter glue on the lacey top of the dress, a spot on her cameo-like pin, and a tiny bit on her hair ribbons.  


You can see the glittler glue on the lacey top of her dress and hair ribbons a little better in this pic


Here's a better pic of the gems on the leaves

Thanks so much for stopping by today.  I'll be back with another version of Dorothy and Toto soon.  Until next time....

Friday, January 3, 2014

Answers to Questions ~ ~ ~ My Copic Storage System


Happy Weekend Blog Friends!

Every once in awhile, I get private (questions not posted on blog) emails regarding this and that.  So, every so often, if I get more than one question on something, I'll be posting answers and hopefully a pic for you.  One question that I've received a few times is "How do you store your Copics and/or other markers?"

I'd tried a variety of storage ideas before coming across this one.  I ordered the towers over a year ago, and am posting now after receiving another question on marker storage.  I have to tell you... I love this storage system!  I ordered the storage cubbies from Studio 3 Solutions.  There are five cubbies in each tower.  The cost is $18.95 per tower, plus shipping.  I'm not done organizing the towers yet (I have a few more), and the reason is....not enough space the way my work area is currently configured.  I'll work on figuring it out tho, and when I do, will post a new pic.  I really like that the refill bottles of ink also fit in the towers (see right tower bottom two cubbies).  If you'd like to visit the webiste for the cubbies, go to:   studio3solutions.net
Also, if you have any questions, please let me know.


Thanks for dropping in today.  I'll be back soon.  Until next time....

Wednesday, January 1, 2014

HAPPY NEW YEAR!


Happy New Year Dear Blog Friends!

Here's the last card in the wine series....for this round.  And like the words say.....Like fine wine, you get better with age!  I hope that you all have a great 2014.  Life does deal us it's ups and downs, and we all do the best we can do.  It's been an extremely challenging year for us, and we hope that 2014 eases up a bit.  The stamps on this card are from Fiskar's clear stamps, die cut is a Spellbinder die.  I used a Cuttlebug folder for the kraft card stock background, brushed lightly with a distress pad.  The dark green ribbon is moire ribbon.  Just love that ribbon.  Edges of die cut are trimmed with Stickles glitter glue.  Image colored with Copics.  I'm sure I'll be making more wine cards later on, and will post them then.


Watching Good Morning America this morning, Dr. Richard Besser suggested that people write down 5 things a day they're grateful for.  He said doing this helps people lead healthier lives, and even reduces stress!  As I was sitting here typing my blog this morning, one of my five today is being grateful for my BLOG FRIENDS!  Thank you all for stopping by today and a special thank you to all my followers and to those of you who leave comments. I am grateful for you!  Hugs, Geri
Until next time...


Hello again! A "long" get well card

HELLO BLOG FRIENDS! It's been a very long time since I've blogged.  You know how life gets in the way of things, and we have cer...